
# Automatic Fan On/Off using NTC Sensor
# Introduction
Sometimes, we do feel lazy to turn the fan on when the conditions are hot and turn it off when the conditions are cold. Wouldn't it be nice if there were an automated system that could perform this task? With KiMu's Advanced Automate Kit, we are going to build a system to automatically turn on/off the fan based on the temperature using a NTC Sensor. The project has a wide range of applications such as Cooling fans for laptops and computers, as well as energy conservation applications.
# Key skills/Learnings
- Problem Solving
- Logical Thinking
- Working of NTC sensor
# List of Items
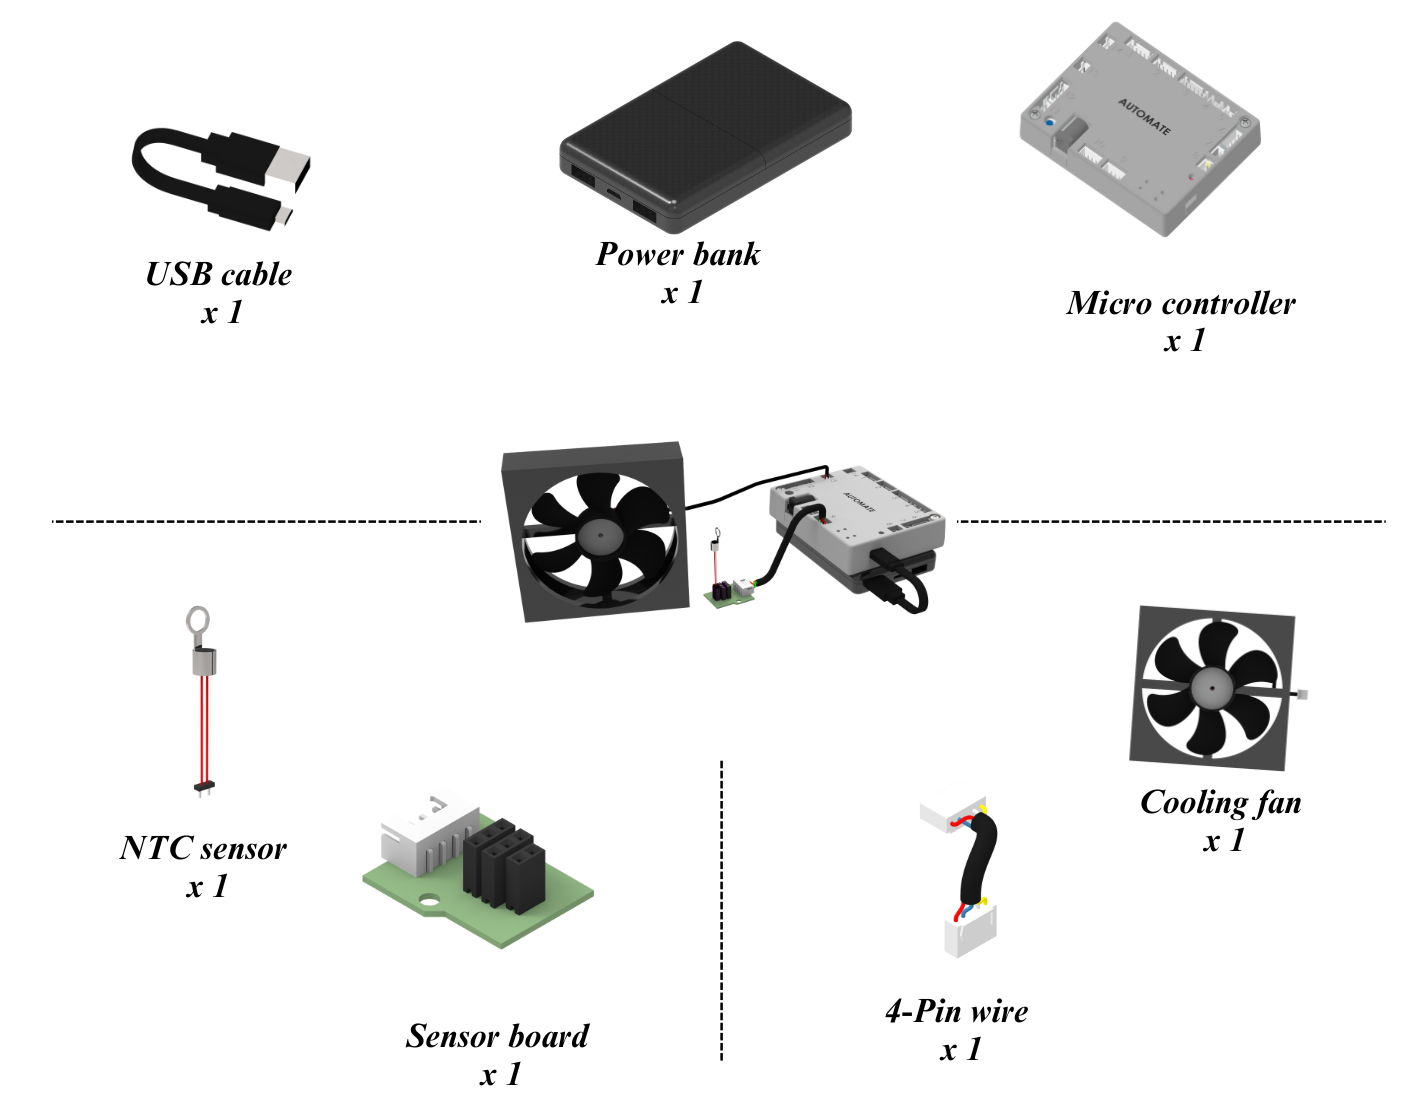
# Assemble the System
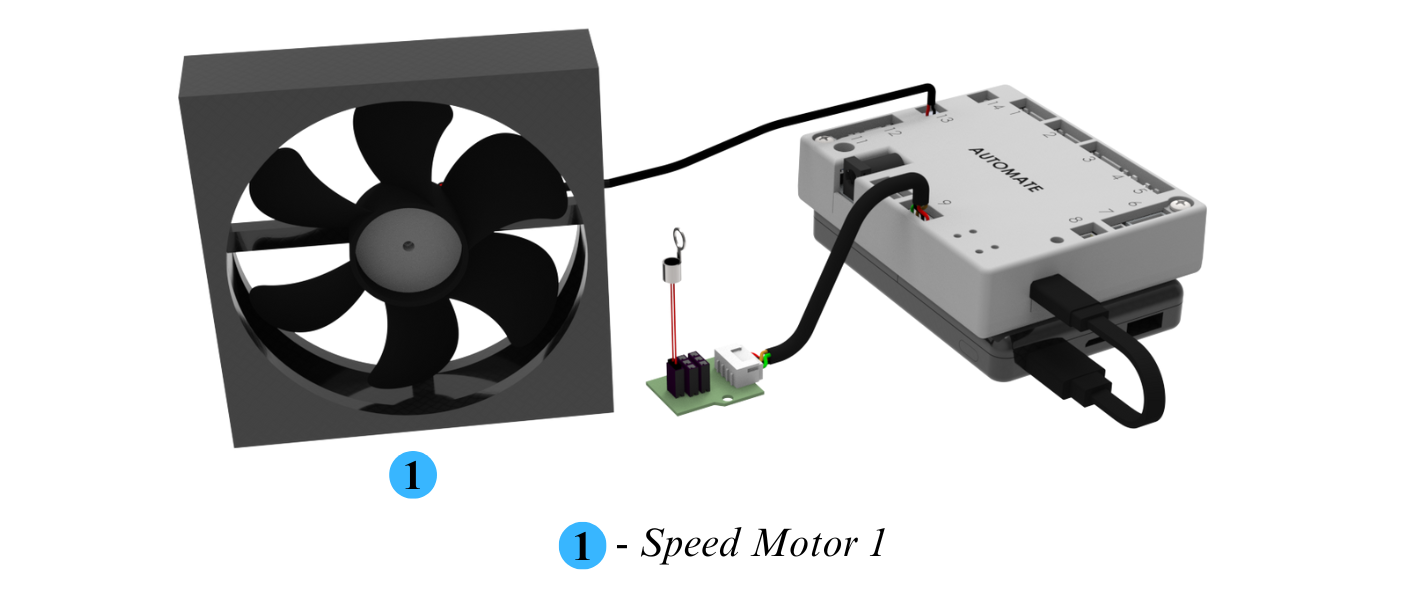
Step 1: Place the Cooling fan wherever you want to reduce the temperature.
Step 2: Connect the NTC sensor to the U1 connector of the sensor board.
Step 3: Place the NTC sensor along with the sensor board wherever you want to find the temperature change.
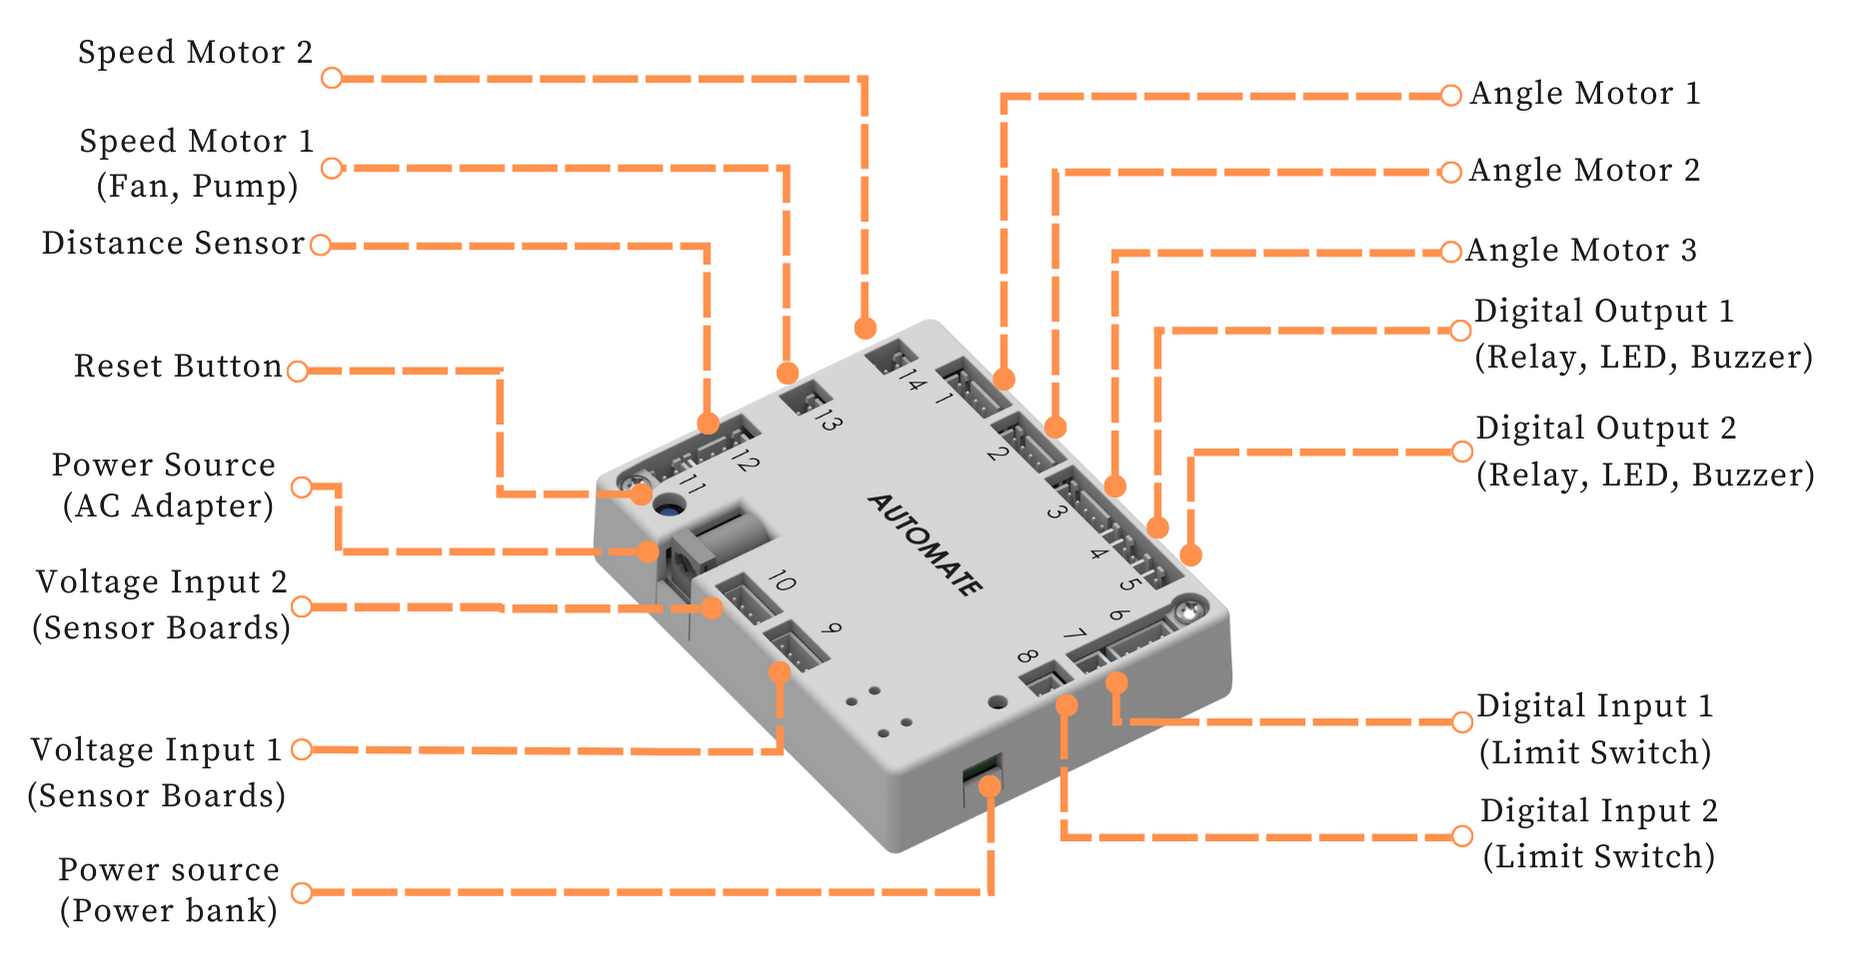
Step 4: For the connection of the Fan, Sensor board, and power refer to image below.
# Programming with Automate App
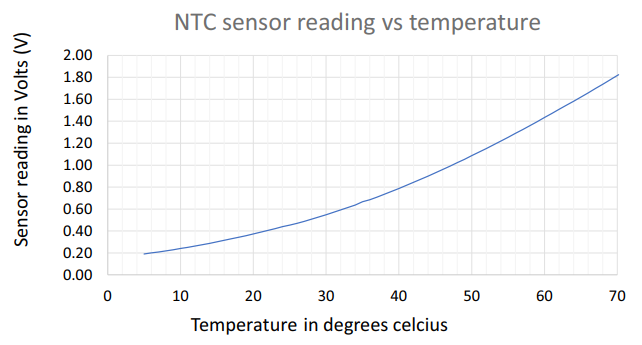
Use debug feature to check the NTC sensor reading at room temperature. Usually, it gives about 0.4V when its temperature is 25°C. The reading increases if the temperature increases. Please refer to the below graph
# Configuring the app - Remote controls setup
The fan can be switched ON/OFF based on the room temperature using the NTC sensor. Here the temperature are 35°C & 25°C to ON/OFF fan respectively.
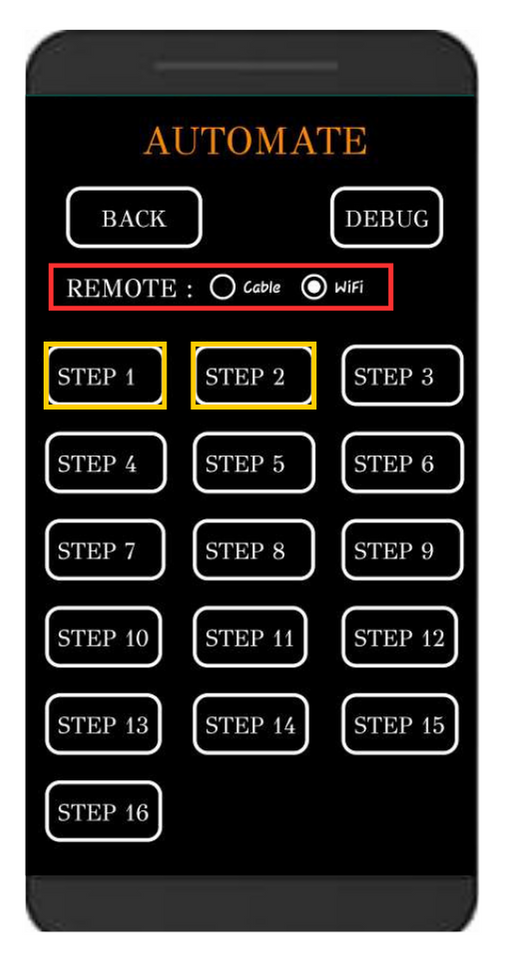
STEP 1- Sensing the temperature
STEP 2 - Switching on the fan
Note: Automate can be controlled using a cable by selecting the cable option instead of Wi-Fi under the remote option.

To upload the program, see How to upload the program to the Control Unit with Automate App?
The fan can now be automated after uploading this program.
# More Information
For more details, see FAQs on Automate Kit.